We tested: Talend Enterprise Data Integration 5.4.1
Written by Dr. Götz Güttich
Enterprises today have to navigate all kinds of data from a wide variety of sources. But they can only derive maximum benefit from their data if it can be used in as many different environments as possible. That is why organizations need a way to integrate their data and exchange it across different systems and applications. Talend Enterprise Data Integration resolves this challenge. We analyzed the product in depth in our test lab.
Enterprise networks are becoming increasingly complex, with different services and applications being added all the time. Managing these networks requires powerful solutions that are able to read data from heterogeneous sources – files, databases, etc.– transform this data into a format compatible with the target system, and finally export the data to its target. There are two different ways to do this. With the ETL (Extract, Transform, Load) method, the data integration system first extracts the relevant data from various sources within the organization’s network. Then – as outlined above – it transforms the data to the format of the target system and finally loads it to the target database. Here, the data integration product carries out all the data transformation tasks, which means that the source and target systems only have to work during the read and write operations.
The second option is known as ELT (Extract, Load, Transform). The difference here is that the integration solution extracts the data and loads it to the target system. The information is transformed directly in the target database before it is used. Here it is the target system that does most of the work. So in terms of integration services, ELT is a much simpler solution than ETL. Talend Enterprise Data Integration supports both methods, which means it can be flexibly deployed in any environment.
Architecture
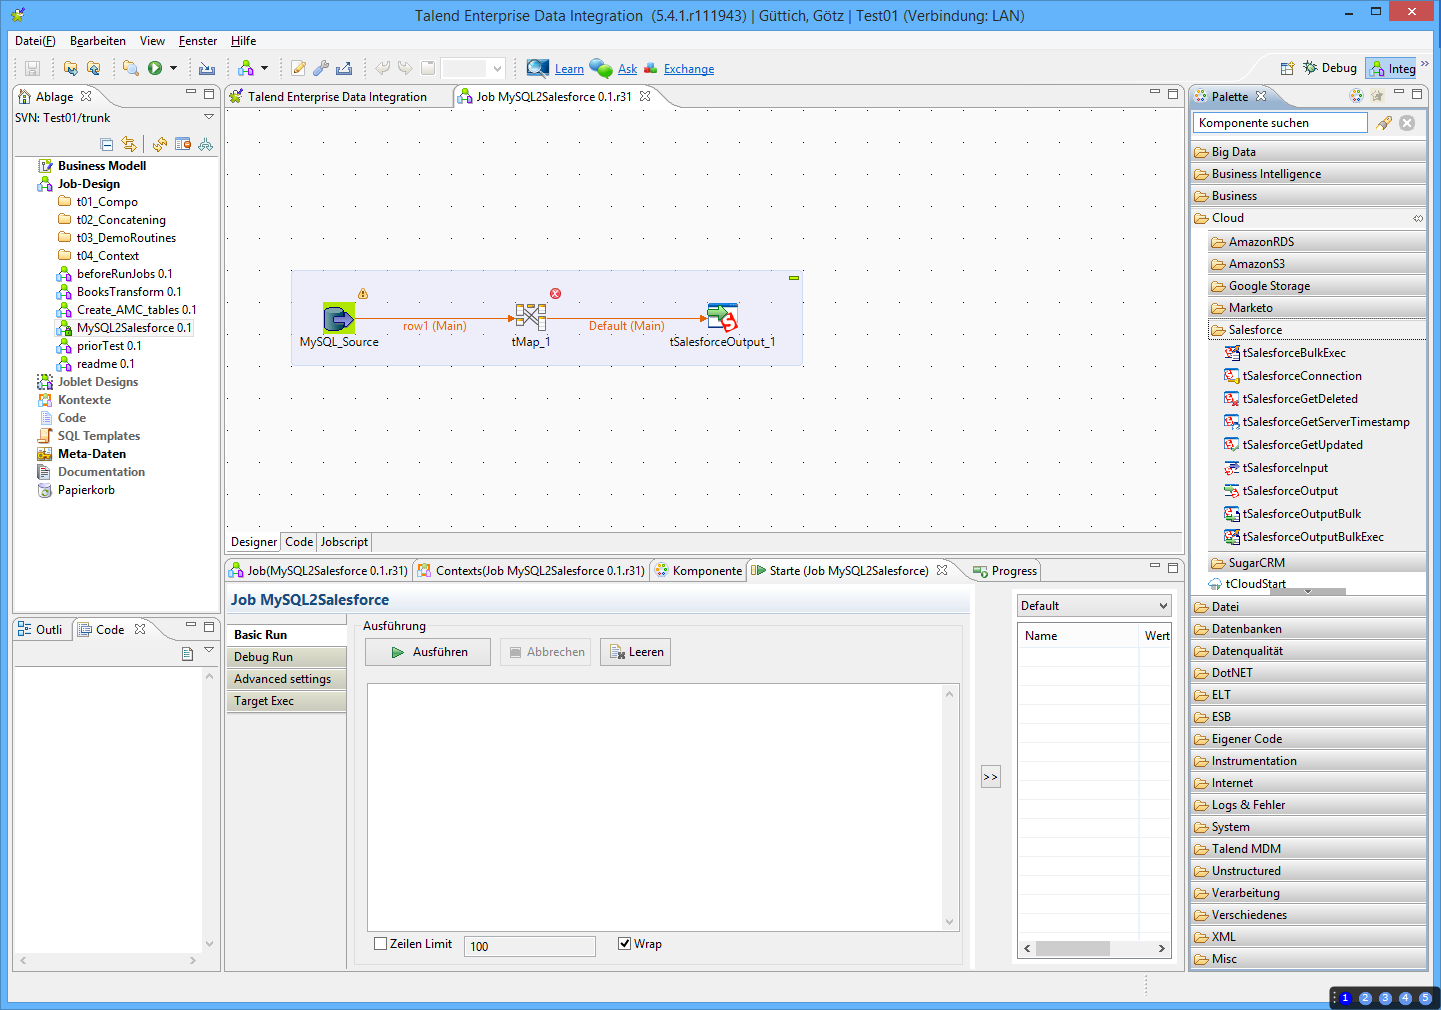
The Talend Enterprise Data Integration solution consists of multiple modules. We will start by describing Talend Data Integration Studio. This studio – a development environment based on Eclipse – allows users to generate all kinds of jobs, including those for importing, exporting and transforming data. Since Talend Enterprise Data Integration is a multi-user solution, several studios can be deployed in parallel in an enterprise infrastructure. We will examine the functions of Talend Data Integration Studio in more detail later on.
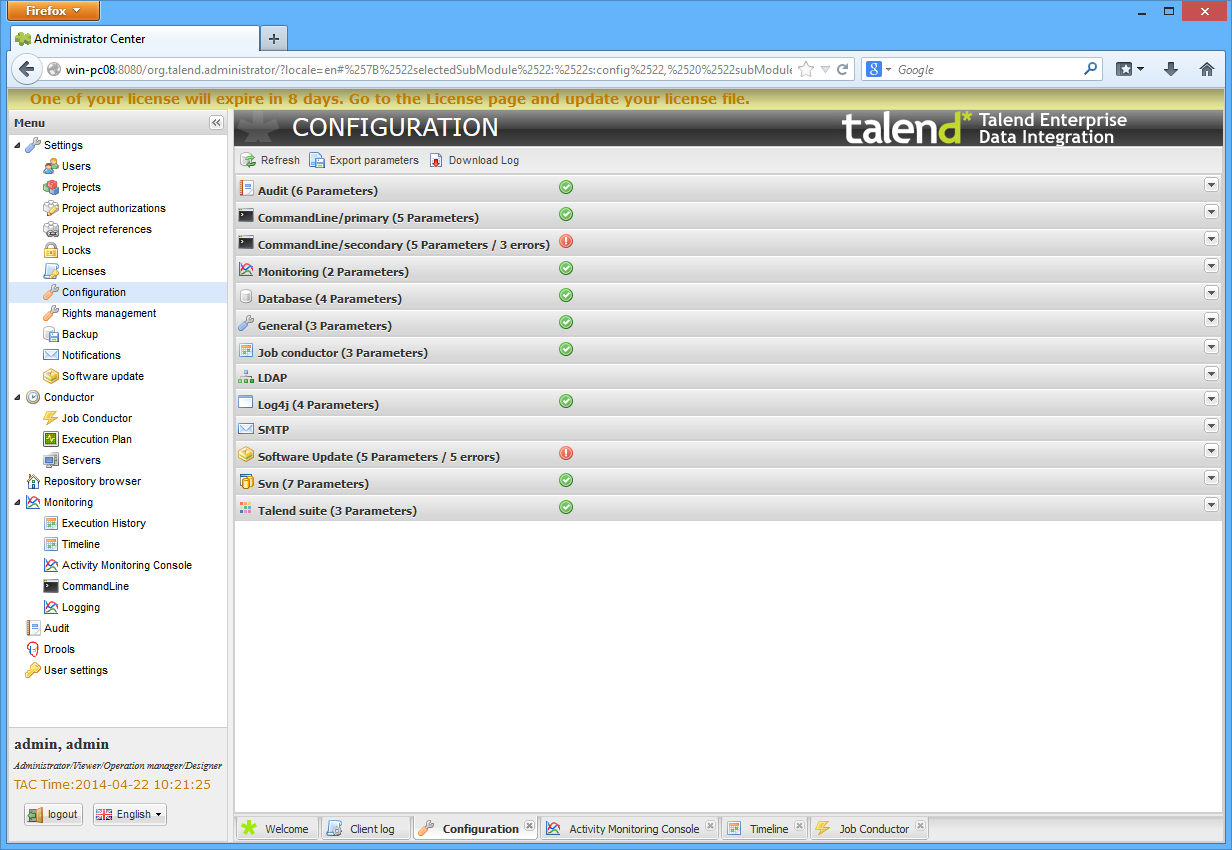
Talend Enterprise Data Integration’s “engine room” is the Talend Administration Center. This Web-based application server manages the various jobs. The jobs can be started on a manual or scheduled basis and can even be triggered by specific events. In addition, the Administration Center allows authorized employees to monitor the distribution of jobs across the organization’s execution servers, which run on several hosts in the network. If required, multiple execution servers can also be clustered to form virtual servers. There is also the option – useful for testing – to transfer individual jobs directly from a studio to an execution server.
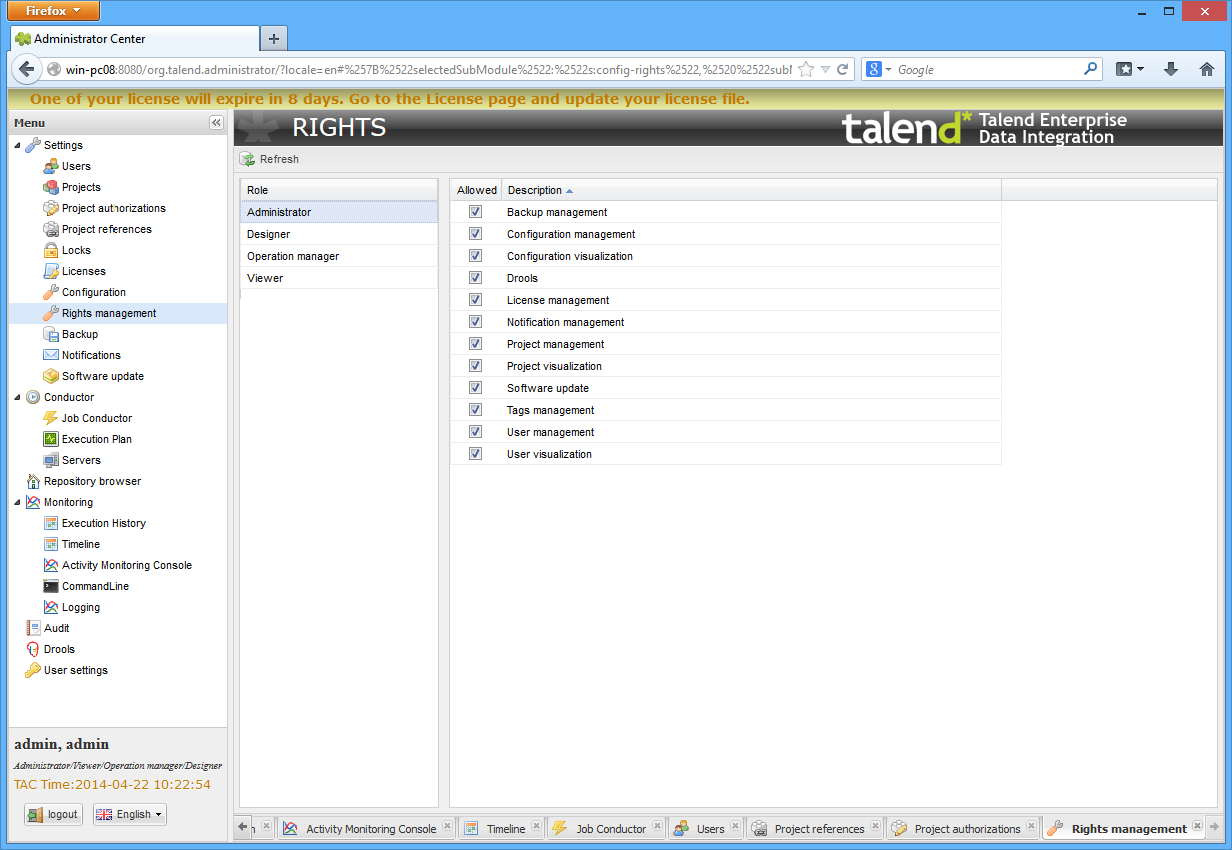
The Talend Administration Center has two repositories. The first contains the project metadata, for example defined jobs, and is based on an SVN server. The second repository uses a database server and contains administrative metadata such as user accounts and access rights.
The test
For the test, we installed and deployed Talend Enterprise Data Integration in our network. It is possible to distribute all of the above-mentioned modules across different systems in the network to improve performance. For our test, however, we were able to install everything (apart from the monitoring database) on a single computer.
When we got the system up and running, we started by analyzing the functions available in Talend Data Integration Studio. We paid particular attention to the ETL functions and support for cloud services.
After that we turned to the Talend Administration Center. We concentrated mainly on the overall functionality, but also took a close look at certain functions that looked particularly interesting, including the execution plans, the Activity Monitoring Console (AMC) and the error recovery features.
Installation
Before installing Talend Enterprise Data Integration, the administrator must ensure that a recent version of Java is installed on the computer in question. Talend specifies that Java 6 or 7 with at minimum the JDK 1.6 Update 11 or later is required. The user must also set the “JAVA_HOME” variable so that the Talend solution can find the Java installation. After that, we installed an SVN server on the same system – a computer running on an Intel Core Quad processor with 2.4 GHz clock speed, 8 GByte RAM and 300 GByte hard disk. The VisualSVN server is used as part of the repository. We created a user on the SVN server and noted the URL we would use later during the installation process.
We were now ready to install the Talend software. To do this we started the Talend Installer, which firstly displays the license terms and asks the user to confirm which data integration solution components are to be deployed on the target system. Since we – as mentioned above – wanted to install everything on a single computer, we selected the Administration Center and also the Log Server, Command Line, Runtime, Job Server, Server Services and Studio modules. Next, the wizard requested the access data for the Web-based Administration Center and the operational communication ports for the individual data integration components.
Once these details had been entered, the installation was complete and we were able to log in to the Web interface of the Administration Center at the URL http://{ server}:8080/org.talend.administrator using our pre-defined login data. We firstly defined the settings for user management (we will describe the tool’s general functions in more detail later on), where we assigned all rights to the admin user so that we could perform all management tasks via this account. We also created an ordinary user account for day-to-day tasks.
Next, we opened the Configuration page. This is where the individual data integration components are managed. In the overview list, working components are marked by a green icon and incorrect configurations have a red icon beside them. Following setup, many items were marked red because at this point a number of the configuration steps had not been completed. Typically, all that needs to be done at this stage is to enter the missing path or login details for the required services (such as the SVN server which we had already installed). The icons beside the relevant services will then turn green and the services are ready for everyday use.
After completing the configuration settings, we created our first project in the Administration Center and assigned the access rights and specified that the user account we had created earlier was authorized to work on the project. Our user was then able to log in to this project with Talend Studio and start working on it. In live operation, there will of course be several projects with multiple users who are active in parallel to each other.
To complete the setup, we setup the Activity Monitoring Console and linked to an SQL server that was available in our network(which we had first created manually) to store monitoring data. We created the associated database tables using a Talend job. The software was now ready to use.